Wednesday, March 27, 2013

So, spring is here, even tough we still have snow!  So not in a very springy mood...so, I'm gonna do something a little different.   This is a 2 parter!
 
 
Part 1
 
I am going to LITERALLY dissect a coconut..well, 2 coconuts.
 
This is what I am starting my project with.  As you can probably guess...I am making SOAP!
Unfortunately, I was not able to get ALL the pics I wanted because   sometimes, the timing of things won't allow it.


I learned how to dissect a coconut and turn in into soap here!


After I opened the coconut and removed and strained the water, I removed the meat from the shell and chopped it up.  I put it in my blender (you need a heavy duty blender...I have a Ninja) along with enough water to almost cover the coconut.  Blend it until the coconut is shredded and the in immersed in a white liquid.


Strain through cheese cloth. When done, this is what you have:  A bowl of coconut pulp, and a bowl of coconut milk!!

 
Set the pulp aside, and the coconut milk goes into a frying pan, on med high heat.


You want it to almost boil.  After about 15 minutes, all the milk solids will become a mass in the middle of the pan, and will be surrounded by coconut oil!!  Pretty cool!!!

 
I then took my pulp and put it on a baking sheet, pit it in the open and toasted it.  After it was toasted, I took it out of the oven and let it cool. It then went back to the blender to make a coarse flower.....doesn't coconut coated shrimp sound yummy??


Part 2 
 
 
Now, for the soap making!!
 
Remember..you are working with lye..so SAFETY FIRST!
  You want to avoid lye burns.....so the rule at my house when I am making soap.....Long pants with shoes and socks, long sleeve shirt, gloves and goggles MUST be warn.
 
 
 I am making a basic Bastile soap.  For complete recipe go to Soaping 101.
 
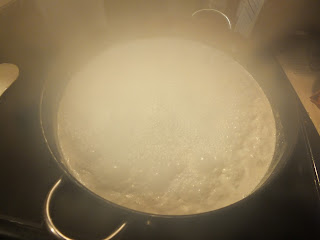
You want to take the coconut water and I had to add a bit of distilled water to get the volume I needed.  You add the lye a little at a time (wearing gloves and goggles of coarse).  The lye will heat the water and it will steam.  DO NOT BREATHE IN THIS STEAM!!  (this should be done in a well ventilated area.  Add lye a little at a time until all the lye is dissolved.
 
In this bowl is a mixture of Olive Oil, the coconut oil that I made, plus a little more, and castor oil.  You will need to heat the oil in order to melt the coconut oil.
 
You want to let the lye water and oils cool til they are approx. the same temp..I am learning that I like them at room temperature.


This is the oil with the lye water added...notice it is a bit milky on the bottom.
 
 
This is after it has been stirred.


I apologize for not having more pics of the process.....
 
Now, I have a new vocabulary word for you. 
Ready?


SUPONIFICATION
 
to convert (a fat) into soap by treating with an alkali.
 
To do this next step, you need to stir your lye water/fat mixture.....this can take a long time, or you can use a stick blender. Just be careful not to splatter your mixture.  You want to blend it until it starts to thicken. This is called TRACE.
 
 
After I reached light trace, I poured half of my soap better into another bowl, and added a bit of cocoa powder to it and used my stick blender to combine. It did get to a thicker trace.   I had previously lined a Pringles can with freezer paper, and I poured my soap batter through a funnel a little at a time into the Pringles can.
 
 For a video of the complete process, go to Soaping 101


Here is the top of my soap, covered with plastic wrap to help prevent ash. 


Here is my soap unmolded. Someone told me it looked like an ice cream push up.


The next 3 pics are my sliced pucks.


I had enough batter to make some little sample cars...these are 1 inch square.


Thank you for stopping by.  Hope you will learn to love soap making as much as I do!!


Happy Resurrection Day!!

Friday, January 25, 2013

Cream Canoes AKA TWINKIES

Today is my first individual post for Our Kreative Karma.  


I am getting off the card band wagon today and showing you another of my hobbies.  BAKING.  I have been baking for about 40 years, taught by my Mom!    My love for baking is a God given gift, which I love to use to bless others.


So, today, I am going to show you how I make Cream Canoes, which closely resemble Hostess Twinkies.  However, because of copyright laws, I am not allowed to call them Twinkies.  And to be honest, I think the Cream Canoes taste a whole lot better than Twinkies. 


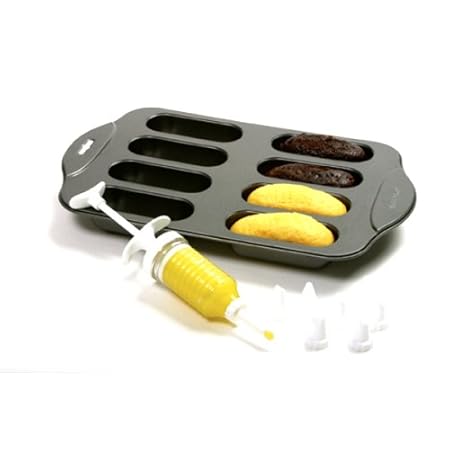
Here is a picture of a pan like the one I use to make my Cream Canoes.  However, these pans are very expensive.  I was given mine as a gift, or I would not own one because of the cost alone.

Here is how you can make the "pans" put of aluminum foil.


Start with a 12 inch square piece of foil.

Fold it in half


Then fold it in half again.  (this is actually a 6X6 inch square now)


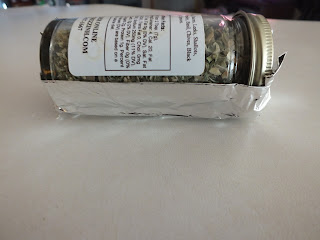
Then use a spice bottle as a "mold" to make our pans.


This is your finished "pan".  You will need 16-24 of these.
When you finish these, you will need to spray them with baking spray, like Bakers Joy. 


Now, for the Recipe.


1 cake mix
1 pkg instant pudding  (use sugar free as the extra sugar in the pudding wiill make the cake too sticky)
2 eggs
2 cups milk

Mix all together with an electric mixer. Fill Twinkie pans (called canoe) and bake as directed on the cake mix box. cool completely. 

I measure my batter with a medium cookie scoop.  2 scoops of batter per cake.

If you don't have canoe pans and don;t want to hand make your own, you can also use this batter and make cupcakes.  (just fill the cupcakes)


Cream filling


2 tsp very hot water
1/4 tsp salt
2 cups marshmallow fluff or cream
1/2 cup shortening
1/3 cup powdered sugar
1 tsp vanilla

combine salt and water in a small bowl and stir until salt is dissolved. Let cool.

Combine marshmallow, shortening, powdered sugar and vanilla in a mixing bowl, and mix with an electric mixer on high speed until fluffy. 

add the salt solution into the filling mixture. 

You can use any flavor of cake, and be inventive with the filling. You can use peanut butter or coffee frosting w/ chocolate cake, you can use spice cake with pureed apple pie filling.  I have also colored my filling to correspond with certain holidays, like green and red for Christmas, red for Valentines Day, or pastels for Easter. 


To fill your Cream Canoes, you will need a pastry bag of gallon sized freezer bag.  You CAN NOT use a regular gallon sized food storage bag as it is not going to be strong enough and WILL split...trust me..I know from experience!  :)


You will need to put a coupler
 Wilton St...

and a star decorating tip....both of these items as well as the decorator bags can be purchased at any craft store or stores like Walmart. 


I put my tipped bag in a drinking glass to make it easier to put the filling in....No more than a few spoon fulls..or it is too hard to squeeze


Here is my loaded pastry bag. 


Here daughter is demonstrating how to fill the cakes...except here, she is holding the bag at 45 degrees, and you want to hold it at 90 degrees.  You only want to squeeze in a little filling, about a tablespoon in each place...or you will split your cake.


Here is what the under side looks like when it is filled.


The completed Cream Canoes AKA Twinkies!


Don't be intimidated.  Go ahead and try these.  I have other copy cat recipes for other Hostess products I can do at a later time.

Please try these....your family will thank you!

Tuesday, January 15, 2013

It's Here!


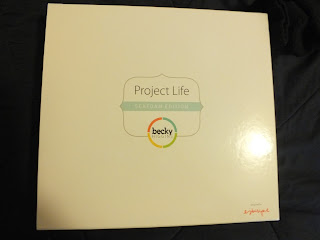
It arrived today!  I have been waiting for what seems like forever for this.

PROJECT LIFE!

When I first saw it, I loved the concept.  I knew my daughter would love it too! So, I bought my first core kit, Clementine Edition, which my daughter got for Christmas.  I wanted to get the Turquoise Edition for myself, but then I learned that there were 2 new editions being released around Christmas time. The new kits are Olive and Seafoam Editions.  I  just HAD to wait for the release.  I just LOVED the Seafoam Edition.  It was actually released last week, and I ordered it the day it arrived Amazon, and it arrived to my home today.


Here is what is inside the box:


This is the Seafoam Edition 4X6 cards.


And these are the 3X4 cards. 


I also purchased a set of page protectors and blank journaling cards.

The  matching binder has not been released until today, so I bought that and a pkg of matching 12X12 paper.   Tomorrow, I will head to Walmart to get some pictures printed so I can get started!

Friday, January 11, 2013


Hello and welcome to Our Kreative Karma's
"Let's Meet the Team Blog Hop"!


We are so very happy you could join all of us on our newest blog venture! We are VERY excited to get back to the MAIN roots of crafting-doing what we LOVE!
You will recognize each of us from the blog world! The women on this team are SO very talented! And that's that is the reason we decided to have this hop; to show you all just a taste of what you are going to be getting from each of the ladies here at Kreative Karma!
So, I am sure you are asking yourself what Kreative Karma is. Well, Kreative Karma  means something different to all of us, and I am very sure you could even have your own meaning if you thought about it! Go ahead, ask yourself what Kreative Karma means to you!
One thing that we all agreed upon was that Kreative Karma was something FUN! Well, you can't have FUN without a blog hop with LOTS of prizes right???? What prizes you ask?

Have a lookie below:


Craftin' and Stampin'
2 packs of BUBS & 1 Silhouette Studio SVG File


Theresa The Scrapbooking Queen
5 pack Action Wobbles


The Cutting Cafe
Any 3 sets of winners choice


Scraptastical Kreations
$15 gift card to store


The Digi Garden
8 Digi Images of winners choice


3 Girl Jam
$10 gift card to store


Creative Bug On The Loose
Creative Bug Package of 4 Digitals


Aren't these prizes AMAZING?


And all you have to do to be eligible to win is:

1. Follow Our Kreative Karma page
2. Follow our AWESOME designers pages
3. Follow each of our sponsors pages
4. Follow Our Kreative Karma on Facebook
5. Leave a comment below with your email/blog address
6. Leave a comment on each designers page (showing some love!!)


Easy right???


Now, are we ready to start hopping???


Here's the lineup:


Our Kreative Karma
Especially Ashley  http://especiallymade.blogspot.com/
Christina Capps  http://cema1cema.blogspot.com
Janet Royer  http://janetscreativeworld.blogspot.com/
Jodie Ruiz   http://www.jodiesscraplab.blogspot.com/You came from here!
Lisa Carrier   http://ourcraftingcorner.blogspot.com/You are here!
Lisa Chamberlain   http://desileedesigningdivas.blogspot.com/ Go here next!
Marji Franklin   http://www.fstampaholic.blogspot.com/
Tess Hilton  www.sassycricutcrafting.com 
Sharon Littrell  http://simplysweetbysharon.blogspot.com/
Jessica Wilson  http://craftinandstampin.blogspot.com

*** Please note: We have 8 Design Team sisters that were NOT able to design with us today, but I would still love for you all to check out their pages and show them some love as well! They are:

Teresa Kaufauld  http://www.createenjoyshare.blogspot.com/
Susie Gerdes  http://scrappyrandomness.blogspot.com/
Jenn Jackson  http://scraphappensembellishit.blogspot.com/
Melissa Lipcsey http://papershenaniganz.blogspot.com/
Jennifer Lorist:  http://www.jennspapercrafts.blogspot.com/
Jessica Buffa    http://jessicascraftshaque.blogspot.com
Heather Lynn  http://heathernovinger.blogspot.com
Robin Lane  http://create-a-latte.blogspot.com/


For my project today, I made a Grandma's Brag Book for my Mom using my Silhouette, and a file I purchased from the Silhouette Store.  This little book was designed by Lori Whitlock, and she has a video on YouTube showing how to put this together.

I used a neutral colored card stock.

The pieces cut with the score lines already in place.


I also used paper from The Daily Grind paper pack


There are tabs for gluing already scored, so putting this together was pretty easy.


My pages are put together!


This is my pages folded and then glued to the cover.


Page inserts are ready for pictures and journaling. 


This is the outside cover. 


Ribbon and embellishments added


Done and ready to fill with pics before grandma gets it. 


 Thank you for stopping by and seeing my project.

And be sure to check back everyday for our designer day!
Jessica from Craftin' and Stampin' will be our first designer tomorrow!


Our winners from today's hop will be picked by Random.Org and announced next Saturday 1/19/2013. You will have until Friday, 1/18/2013 to go through and follow all rules of the hop!


OK All! Have fun hopping along!!