Sunday, November 11, 2012

Thank You, Happy Birthday and Congratulations! All in one day!


We have a lot going on this week, that we needed to make cards for.

This first card is for my Daughter In Law, who has a birthday this week.  The inspiration for this card was from this weeks Mojo Monday!

This next card I saw on a video on YouTube.  It will be given to friends from church who are renewing their wedding vows this week.

It is a standard A2 sized card.   The hearts were cut from the Artiste Cricut cartridge.  The 2 black hearts were cut at 2 1/4 inches and 2 white hearts were cut at 1 3/4 inches.  I cut one of the hearts to look life the one in the picture. I added black and white pearl pen to the white hearts.  You can't see it in the picture, but the  white paper is embossed. 


This next card was made by my daughter.  On Thursday, we went to school for a parent/teacher conference.  The conversation went on to my daughter being asked what kind of things she likes to do at home. Her answer?  Card making.  So her teacher asked her if she (my daughter) could make her (the teacher) a card. She (teacher) also asked it she could put a penguin on the card.

She used a Close To My Heart snowflake stamp with white ink. Her penguin fro Create A Critter 2 cut at 3 1/2 inches. She loves Stickles, so that is what she used to embellish her card.


Monday, November 5, 2012

Knitting Too!

I have been doing some knitting over the past few days. Christmas is coming quickly, and I thought I would make each of my daughters a scarf.  My youngest daughter loves orange, but it is hard to find anything fun in a true orange.   Then I found this yarn at Michaels.  It is a kind of fuzzy yarn.  the cost  was $4.99 per skein, but I had a coupon for 40% off 1. 


I started by casting on 21 stitches on US size 11 knitting needles. The whole thing is straight knitting. Nothing fancy.  


Now, I get to start a scarf for my other daughter!  This next one will really be different. 

Friday, November 2, 2012


Christmas will be here soon, and I love to bake for Christmas...and I do A LOT of it. When I was planning my "menu" of baked goods for this year, I noticed that my favorite cookbook is old ad falling apart. So, I decided to make myself a cookbook, scrapbook style.  This is my first page, and will be in the "Christmas" section.

One of my favorite snacks during the Thanksgiving & Christmas holiday season is home made Ginger Snaps with dip them in Pumpkin Butter.


I used 4 cartridges for this layout.


I made a Ginger Snap cookie that I found in the From My Kitchen cartridge. It is on page 65 of the handbook using the cookie/shift feature, and is cut at 4 inches.  I used while Gel Pen to write "Ginger Snaps" on the cookie.


I used Baby Steps cartridge to make the jar. It is found on page 66 of the hand book, and cut at 6 inches using Baby Food/layer1/shift features.  It cuts out 2 connecting jars and I cut one of them off and used the jar on the right. 

The pumpkin is cur from Create A Critter 2, and found on page 62 of the handbook, cut at 3 inches using the accessory/shift feature.


What is Christmas with out  gift. This little gift was found in Birthday Bash cartridge, on page 27 of the handbook, and cut at 4 inches. using layer 1/shift feature for the package and layer 2 for the ribbon.


Here is my completed project. I am using red foil paper for the matting for the recipes. 


For my next project, I used New Testament cartridge. The image of Baby Jesus is found on page 25 of the handbook and cut at 4 inches.  You really can't tell by the picture, but the background paper is purple, and the writing is in Denim Blue.


                                                                   Thanks for stopping by.

Thursday, October 25, 2012

Contraband? Really?

I received a note from one of the recipients of my "secret project" cards.  This received notification that I had sent something, but was considered contraband and they could not receive it.  When I called to find out what I sent that was contraband, I was old that I ma not allowed to send any home made items. So, I guess this one particular person will get hand written notes instead of cards.

Wednesday, October 24, 2012


All the paper from this card is from the SEI  Vanilla Sunshine paper pack. I made the tag from Elegant Edges cartridge.  It can be found on page 58 on the handbook, cut at 3 inches.  The ribbon is velveteen to give the card some texture.  I used light green pearl pen to embellish the round tag.  


Thanks for stopping by.  

Tuesday, October 9, 2012

The Cross is the Answer


My card was made using New Testament Cartridge.  I used the "Cross" feature on page 52.  It was cut at 5 inches, and then set on the paper so I could cut the paper at 6 inches square with the crosses in the center.

I used brown card stock and made a 6 X 6 inch card.  I cut a piece of "wood grain" printed paper and 6 X 6 inches and covered it with the negative space cut.

The tag and sentiment are from My Daily Bread Designs. 


Thanks for stopping by.  

Friday, October 5, 2012

Inking Embossing Folders


I want to apologize for the unedited pictures.  My computer crashed a couple weeks ago and along with my computer, I lost my photo editing program.


My first project was made using the Forever Young cartridge.

The first thing I did was ink one side of my embossing folder.  I then took a 4 X 4 3/4 inch piece of dark colored card stock and embossed it with the inked folder 


This is what the folder looks like when you remove the paper.  The ink will rinse off your folder with warm soapy water.  I do this a lot and have never had a folder stain.


This is my paper after it was embossed with the inked embossing folder. 


I used the "Emblem" feature found on page 36 of the Forever Young cartridge handbook and cut it at 4 inches.


This is my completed card.


For my next card, I cut this tag out from the Jubilee cartridge found on page 81 of the handbook. I cut out 8 tags total. I cut out 4 in white, 1 each of 1, 2 , 3 and 4 inches. I cut out 4 in black, 1 each of 1.25, 2.25, 3.25, and 4.25 inches.   I then cut the small layer and the loop off to make a rectangle.  


I then took the white rectangles, and used a small amt of removable adhesive and layered he white cuts making sure they were as centered as possible. I then took black Momento ink and randomly stamped a flower on the layered paper.  Make sure you use an ink that will not run.  After I stamped on the flowers, I also randomly stamped small leaves. 

I then colored the flowers and leaves with alcohol ink markers.  

I then separated the layers, and adhered the white colored layers to the appropriate sized black layers, then completed layering all layers.

Here is my completed card. 

The flower and lead stamps, and sentiment is from Close to My Heart. 


For my next card I used the cartridges Tags, Bags, Boxes and More 2 and Every Day Pop Up Crds. 

The bird is found in Every Day Pop Up Cards on page 29 of the handbook, cut at 2 inches. I used black gel pen to outline the birds wing.

The "Thank You" is found  in Tags, Bags, Boxes and More 2 on page 24 of the handbook, cut at 1.75 inches.  I used Cream Pearl Pen  on the flowers and Transparent Rose Pearl Pen on the "Thank You".   I also embellished with precut flowers, buttons and pearls. 


T

Monday, September 17, 2012

Supporting Breast Cancer


My card today was made for a friend from high school who is a breast cancer survivor. 

To make my card, I used Create A Critter 2.  I used the chick found on page 44 of the handbook, cut at 3.25 inches. I used the shadow feature with this chick.


My card is a standard A2 sized card.  I just love the bright pink paper I found. The bright pink layer was cut at 5.25 X 4", and the word paper was cut at 5 X 3.75".   The little pink tag was cut at 1.25 X 2.25", and then I rounded the corners. The sentiment is from CTMH "Sentiment" stamp pack and stamped with recollections Bubblegum chalk ink.  On the ribbon on the bonnet, the wing and beak, I used Glam Pink Stickles.  I used black gel pen on the tag and the bonnet.   


 Thanks so much for stopping by!  Please stop by Erica's blog at http://mycricutcraftroom.blogspot.com/ to see more great cards!


Friday, August 31, 2012


My son and daughter in law recently celebrated their first anniversary.  So, I made this card for them.  It is a standard A2 size card. 
 I used Formal Occasion to make this bouquet.  I made the base green and the flowers purple because those were their wedding colors. 

The bouquet is found on page 55 of the handbook, and cut at 3.25 inches. Before I glued the layers together, I applied purple glitter to the cut swirls. I then put the layers. 


To make the layers, I used green paper from KaiserCraft, cut at 5.25 X 4.75 inches.  and another at 4.75 and 4.25 inches. The purple layer is from SEI and cut at 5 X 4.5 inches.   The purple twine is from The Twinery. 


On the inside of this card, I used George and Basic Shapes to make my "1", which is found on page 82 of the handbook. and cut at 3.25 inches. I used the shadow and silhouette layers.  I used Galaxy Markers to make my "st" and used white gel pen to make the dots. The "Happy Anniversary" is from Close to My Heart "Card Word Puzzle" stamp set. 


My next card is a part of my Secret Project.  Because of the nature of this project, I'm not allowed to embellish them. I am only allowed to use paper, adhesive and ink.  I actually made 4 of this particular card. 

This is a standard A2 size card. I used New Testament to make this card.  For the bottom layer, I used wood toned paper, cut at 5.25 X  4 inches. I cut strips from 3 different papers cut at 1.5 X 3.5 inches.


The cross is found on page42 of the handbook, cut at 3 inches. I cut at 2 X 2  2.5 inches. I used a 1/4 inch corner rounder to round off 2 opposite corners, then inked the edges in chocolate brown ink. The sentiment is stamped w/ the SEI ink Tiffany.  The sentiment is from Our Daily Bread Designs "Crown of Thorns" stamp set.


Wednesday, August 22, 2012

An Apple A Day......


I made my card today using the Just Because Cards cartridge. This is a standard A2 sized card.  I used the apple found on pg 46, and cut 9 of them at 3 1/2 inches.


When I glued the apples to my card, I left one spot open.


I used Peapod Twinery twine and wrapped it around the layered paper 3 time. I them glued the remaining apple to the empty space.

To embellish my apples, I used cream and dark brown pearl pen,  and star dust stickles.   I did not use a sentiment yet because I am not sure what I will use this card for.


Thursday, August 2, 2012


Welcome to Erica's Craft Room
100 Cricut Cartridge Blog Hop Day ONE


You should have started at http://mycricutcraftroom.blogspot.com/ if not please start at the beginning


Welcome to My Cricut Craft Room's August 100 Cartridge Blog Hop

Collectively the design team uses over 100 different Cricut Cartridges in their projects during the two days of this hop. Sunday the new members of the design team will be announced and some have even made a project to share with you!! What an exciting weekend!!

As special treat enjoy 10% off of your total purchase with Erica's Craft Room Store.
Use the code AUGUST to see 10% off of your total purchase (No exclusions)


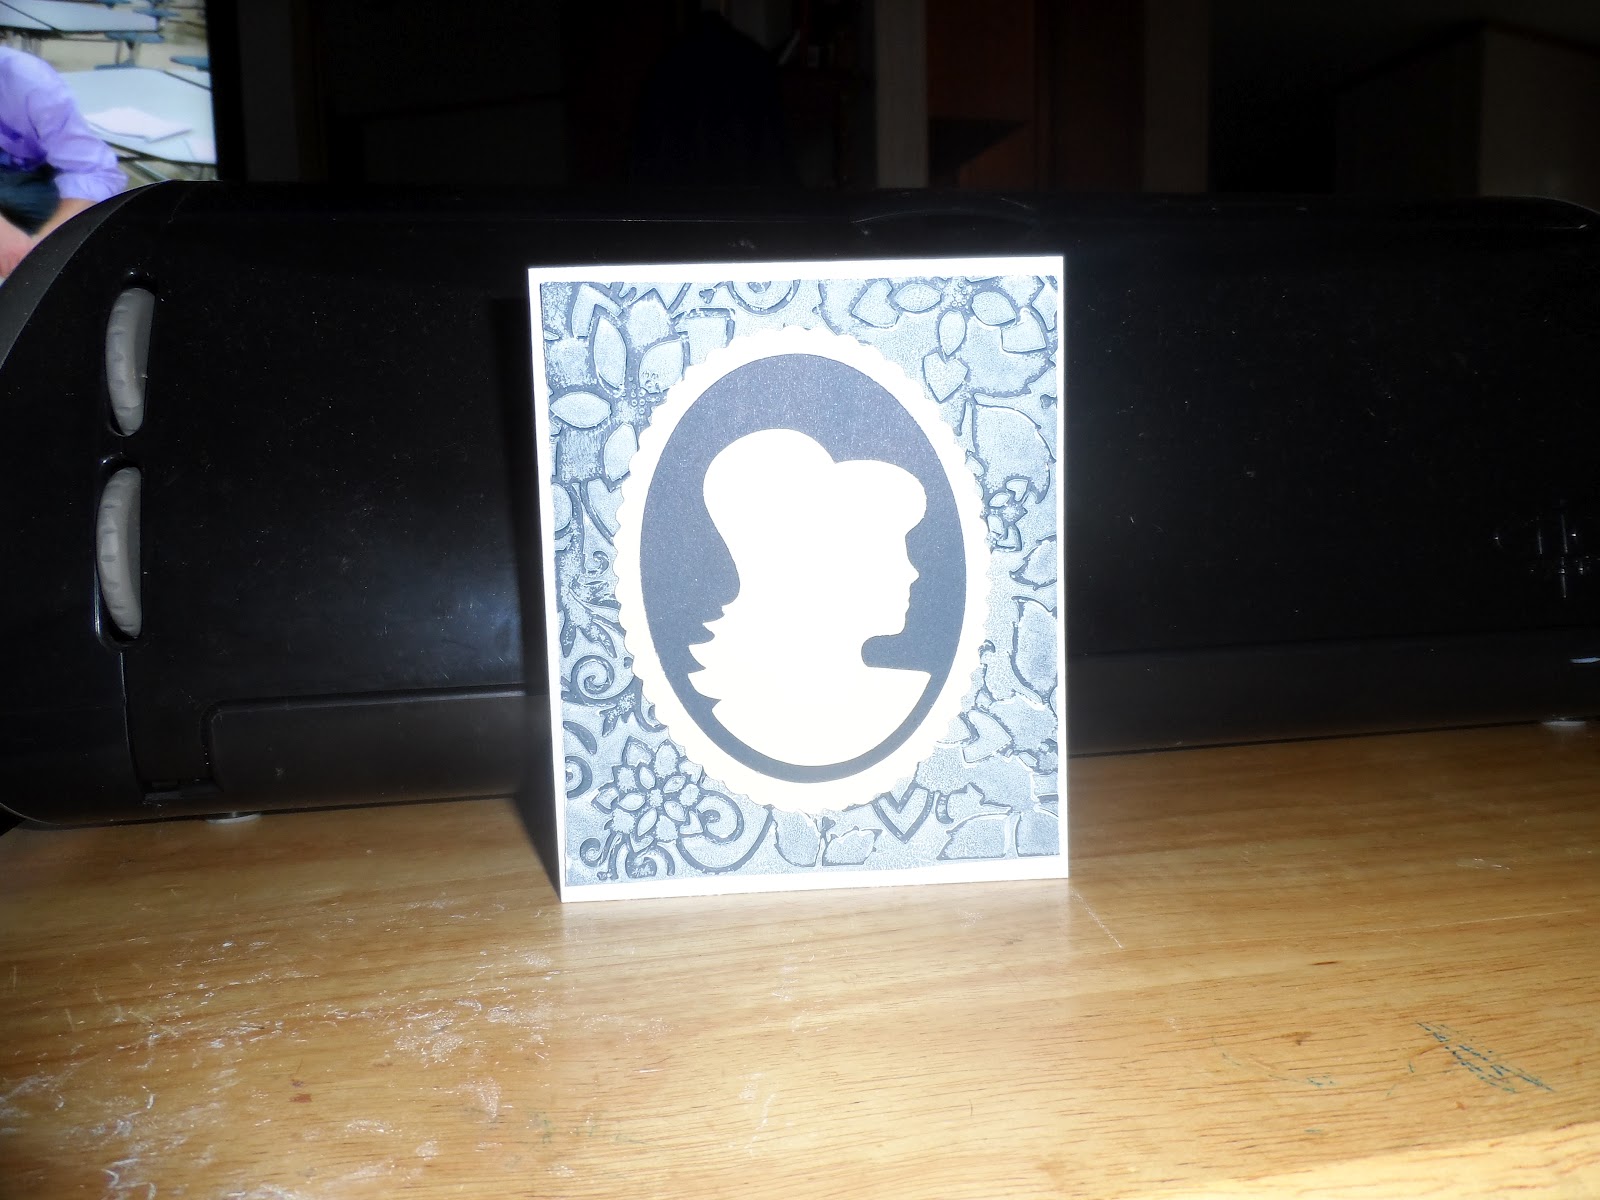
I made 3 projects for you today, using 3 cartridges:  Ribbons and Rosettes, Simply Charmed, and Hello Kitty Greetings.


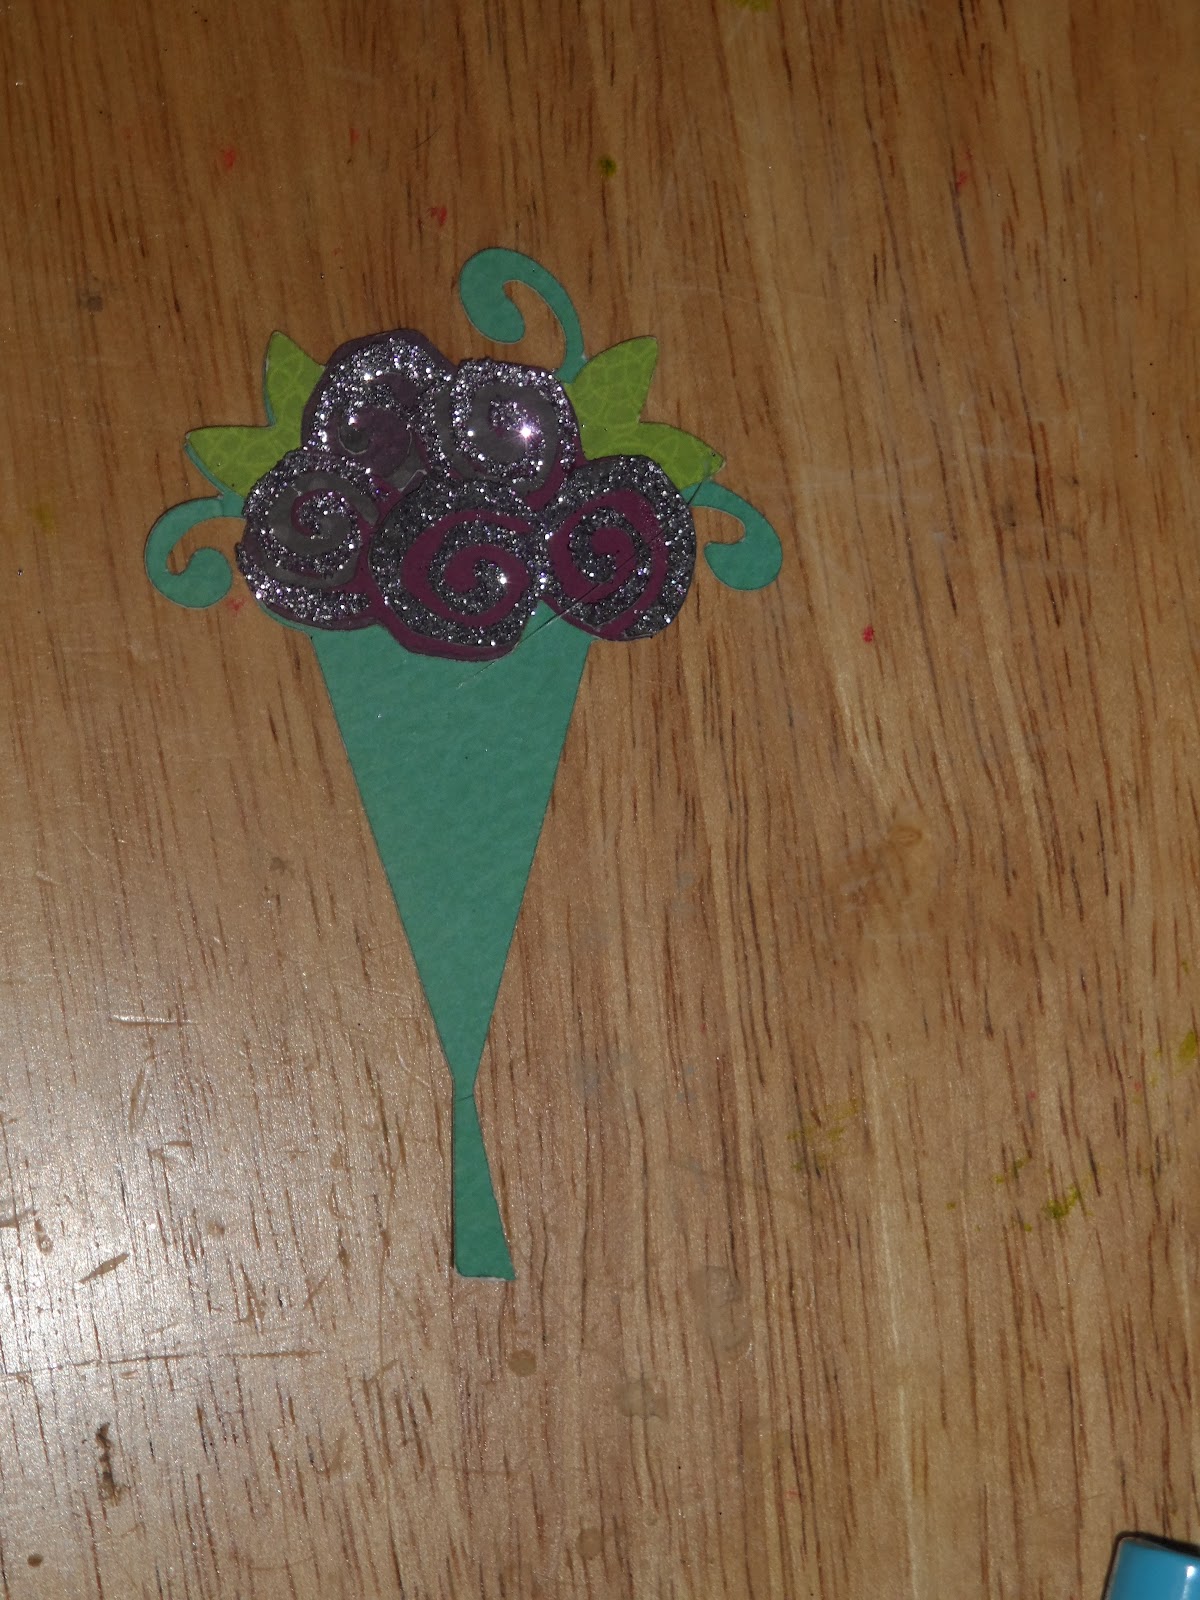
On my card using Ribbons and Rosettes, I cut my rosettes  1"X11" border, set at 1 inch.   Using my score board, I scored at every "valley"  on the cut border.  You then accordion fold the strip, then glue the ends together. I used Tombow Mono Multi Glue.  I love the fact that when you use this cartridge, you don't have to worry about cutting the end fold off for it to work.


Once glued, you put what you want to be the outer edge of your rosette on your work surface, and bring the top edges to the center, and pull them together to make your rosette.


I like to use a hot glue gut to hold my rosette together.  I find this works the best,,,just be careful not to touch the hot glue. You do meed to hold it in place while the glue cools. 


I like to put a little hot glue in the opening on the front as well.   You can then decorate the front. You can use flowers, buttons, or make your own embellishment.  I actually made 5 different rosettes and used one different from the one in the one in the piuctures


For my card, I used a sketch from Mojo Monday. 

The rosettes I used were on page 31 (Petal) and page 26 (bracket).  This is am A2 sized card, corners trimmed with a corner rounder.   I cut 4 pieces of paper at 1X2 inches and trimmed the edges to resemble ribbon, and adhered them to the card. I then cut another piece if paper 5 1/2 inches X 2 1/2 inches and wrapped twine around it before adhering it to the card. I then took a piece of paper from my scraps that has a cloth like texture cut 3X 1 3/4 and adhered that to my card. the last cut of paper is 4 inches X 1 1/2 inches, and then gave the end a "ribbon cut" at one end. I also used black gel pen to put a bit of a border on some of the sheets.  

To embellish my rosettes: On the larger one, I cut a 1 inch scalloped circle, and put a lg "pearl" on the center. I also placed some pink pearl pen on each scallop.  On the smaller rosette, I cut a 3/4 inch circle and put a small "pearl" flower in the center.  I glued the rosettes to the card with Tombow Mono Multi Glue.  I also used an extra flower embellishment that is adhered by a piece of foam adhesive.


For my second card I used the Simply Charmed cartridge.  School is starting soon, so I made a card to put in my daughters backpack on the first day of school.  

This card is a standard A2 sized card. The first layer was cut at 5 1/4 X 4 inches, and the top layer was cut at 4 3/4 X 3 1/2 inches.

I cut the crayon box out at 3 1/2 inches using "crayon", "layer 2" and "shadow".  The lines on the crayons and the eyes are black pearl pen, and the cheeks are red pearl pen.  The letters I found left over in my sticker box.


My last card is made from Hello Kitty greetings. I chose this cartridge not having any idea what I would do with it.
My son is visiting from Va.  he saw this cartridge and commented that his girlfriend would LOVE that cartridge as she is a HUGE Hello Kitty fan. So, I made this card for him to bring home to give her. 

This is a standard A2 size card.  my layer is cut at 5 1/2 X 4 inches.  The kitty is found on page 49, and cut at 3 1/2 inches using "HK9", white fur/bows&nose, clothes layers.   I used diamond stickels on the bow and Kitty's eyes and pink liquid pearls for the nose.


The "I LOVE YOU" is found on page 48 and cut at 3 1/4 inches using "iloveyou",  shadow, and clothes/clothes layers.  I filled the "O"s in with diamond stickles, and made a border with cotton candy stickles.  


I usually center my layers, but this time I put it on the lower right corner, and I love how it looked.  I thought it looked kind of plain, so I decided to had a thought balloon.  To make the thought balloon, I cut the cloud on page 66 at 1 1/2 inches. The sentiment is from CMTH "Sympathy" stamp set. The dots up the thought balloon are white pearl pen, and I used star dust stickles to outline the thought balloon.


This is the inside of the card. 


Thank you for coming and checking out my projects. Next, you can go HERE for some Blog Candy!

Here is today's line up:

  1. MCCR http://mycricutcraftroom.blogspot.com/
  2. jenn lorist http://www.jennspapercrafts.blogspot.com
  3. Teresa   http://www.createenjoyshare.blogspot.com
  4. Kathy http://3spoileddogs.blogspot.com
  5. shelley http://shelley-scrapbookingforfun.blogspot.com
  6. heather http://heathernovinger.blogspot.com
  7. Jessica S http://jessicascraftshaque.blogspot.com
  8. Tammy http://www.Cuttinandstampin.blogspot.com
  9. Jen L http://www.mybusycraftylife.blogspot.com
  10. Erica's Projects http://ericasprojects.blogspot.com/
  11. Samantha http://www.samanthascricutcreations.blogspot.com
  12. robin http://create-a-latte.blogspot.com/
  13. amy http://clayfulimagination.blogspot.com
  14. Miranda http://www.nanasscrapspot.com
  15. Angie http://crazyscraplady-angelpie.blogspot.com
  16. LB http://www.coolbeansbylb.blogspot.com
  17. Cathy http://cathyplus5.blogspot.com
  18. Claire http://threewaterscreations.blogspot.com
  19. Lisa Carrier http://ourcraftingcorner.blogspot.com
  20. Blog Candy http://ericasblogcandy.blogspot.com/

Tuesday, July 17, 2012


It's Would You Ever Guess Wednesday at My Cricut Craft Room. Today, we were given an option to make a project using Peachy Keen Stamps.  I love these stamps. They are so fun to use. 

Summer is here, and we  planned a trip to the beach! I made this layout for our trip. We almost had to cancel because of shark sightings.   I apologize for not having pictures  in place on the layout...just have not had the time to get them printed.

We went to Wallis Sands Beach in Rye, NH.  I have been visiting the tide pools there since I was a child, and always enjoyed looking for and finding things like star fish, baby crabs, sea urchins and sand dollars.  It has been many years since we have seen at this particular tide pool.  On our way, we were praying that God would show us some awesome things on this trip.  We did see lots of baby crabs. We even saw a baby star fish. But I found something I have never seen there before or anywhere else.  I actually found 5 or 6 baby lobsters.  On our way home, my daughter decided we need to go to the beach more often.  I think she's right.

For my layout, I used Everyday paper Dolls Cartridge.  The doll is on page 28, the sun is on page40, the swimsuit, pail and shovel are on page 41, and the girls hair and headband are on page 47, all cut at 3.5 inches w/ real dial size off.  I used Peachy Keen Simple Sallies stamp set. 


The sun and girl are cut from a sheet of Paper Layerz. The letters are Thickers.  I love the "stitching" on these letters!


Thanks for stopping by!


Please go to http://mycricutcraftroom.blogspot.com/ to see more great projects!

Thursday, June 28, 2012


Welcome to My Cricut Craft Rooms July
 100 Cricut Cartridge Blog Hop!


You should have started at http://mycricutcraftroom.blogspot.com/ if not please start at the beginning.


Welcome to My Cricut Craft Room's one year "BLOG-iversary" of our first 100 cartridge Blog hop!
A year ago the blog was kicked off with the first design team members and daily postings. It took 2 months to get ready for this hop last year. Now we bring it to you the first full weekend of every month.

Collectively the design team uses over 100 different Cricut Cartridges in their projects during the two days of this hop. Today, the new members of the design team will be announced and some have even made a project to share with you!! What an exciting weekend

As special treat enjoy 10% off of your total purchase with Erica's Craft Room Store.

Use the code JULY to see 10% 
off of your total purchase (No exclusions)
on July 7 & 8. Also on Sunday there will be an exciting announcement!!!


My first card was made from the Formal Occasion and Tags, Bags, Boxes and More Cartridges.  The TBBM2 cartridge I purchased from Erica's Store

The card base was cut from TBBM2, and can be found on page34 of the booklet. It was cut at 4.5 inches. 

The background paper I also got from Erica.  The flower was cut from the Formal Occasion cartridge and found on page 52 of the booklet. I used scraps to cut the flower at 3.5 inches


The 3 butterflies are cut with a 3D punch. I then added Stickles in the following colors to the butterflies.: Tropical Tangerine, Diamond and Yellow, as well as a little Mint green Liquid Pearls.  I used Clear Rock Candy Distress Stickles to the greenery of the flower.


My 2nd card was made using the round Flip Its die and Twinkle Toes Cartridge. The Twinkle Toes Cartridge is a lite cartridge so it does not have a booklet. I made this card for my 8 yr old daughter as she is currently training to become a competitive cheerleader!

The "Cheer" embellishment was from the 3-10 button on the overlay, using the layer and shift buttons.


Both of my embellishments were made from one sheet of paper! 


The back ground paper I used for the front and back of my card were from Erica.