So, spring is here, even tough we still have snow! So not in a very springy mood...so, I'm gonna do something a little different. This is a 2 parter!
Part 1
I am going to LITERALLY dissect a coconut..well, 2 coconuts.
This is what I am starting my project with. As you can probably guess...I am making SOAP!
Unfortunately, I was not able to get ALL the pics I wanted because sometimes, the timing of things won't allow it.
I learned how to dissect a coconut and turn in into soap here!
After I opened the coconut and removed and strained the water, I removed the meat from the shell and chopped it up. I put it in my blender (you need a heavy duty blender...I have a Ninja) along with enough water to almost cover the coconut. Blend it until the coconut is shredded and the in immersed in a white liquid.
Strain through cheese cloth. When done, this is what you have: A bowl of coconut pulp, and a bowl of coconut milk!!
Set the pulp aside, and the coconut milk goes into a frying pan, on med high heat.
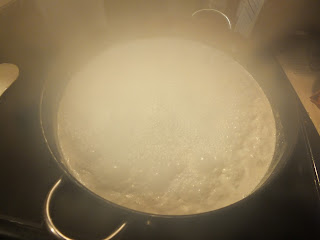
You want it to almost boil. After about 15 minutes, all the milk solids will become a mass in the middle of the pan, and will be surrounded by coconut oil!! Pretty cool!!!
I then took my pulp and put it on a baking sheet, pit it in the open and toasted it. After it was toasted, I took it out of the oven and let it cool. It then went back to the blender to make a coarse flower.....doesn't coconut coated shrimp sound yummy??
Part 2
Now, for the soap making!!
Remember..you are working with lye..so SAFETY FIRST!
You want to avoid lye burns.....so the rule at my house when I am making soap.....Long pants with shoes and socks, long sleeve shirt, gloves and goggles MUST be warn.
I am making a basic Bastile soap. For complete recipe go to Soaping 101.
You want to take the coconut water and I had to add a bit of distilled water to get the volume I needed. You add the lye a little at a time (wearing gloves and goggles of coarse). The lye will heat the water and it will steam. DO NOT BREATHE IN THIS STEAM!! (this should be done in a well ventilated area. Add lye a little at a time until all the lye is dissolved.
In this bowl is a mixture of Olive Oil, the coconut oil that I made, plus a little more, and castor oil. You will need to heat the oil in order to melt the coconut oil.
You want to let the lye water and oils cool til they are approx. the same temp..I am learning that I like them at room temperature.
This is the oil with the lye water added...notice it is a bit milky on the bottom.
This is after it has been stirred.
I apologize for not having more pics of the process.....
Now, I have a new vocabulary word for you.
Ready?
SUPONIFICATION
To do this next step, you need to stir your lye water/fat mixture.....this can take a long time, or you can use a stick blender. Just be careful not to splatter your mixture. You want to blend it until it starts to thicken. This is called TRACE.
After I reached light trace, I poured half of my soap better into another bowl, and added a bit of cocoa powder to it and used my stick blender to combine. It did get to a thicker trace. I had previously lined a Pringles can with freezer paper, and I poured my soap batter through a funnel a little at a time into the Pringles can.
For a video of the complete process, go to Soaping 101
Here is the top of my soap, covered with plastic wrap to help prevent ash.
Here is my soap unmolded. Someone told me it looked like an ice cream push up.
The next 3 pics are my sliced pucks.
I had enough batter to make some little sample cars...these are 1 inch square.
Thank you for stopping by. Hope you will learn to love soap making as much as I do!!
Happy Resurrection Day!!


