I want to apologize for the unedited pictures. My computer crashed a couple weeks ago and along with my computer, I lost my photo editing program.
My first project was made using the Forever Young cartridge.
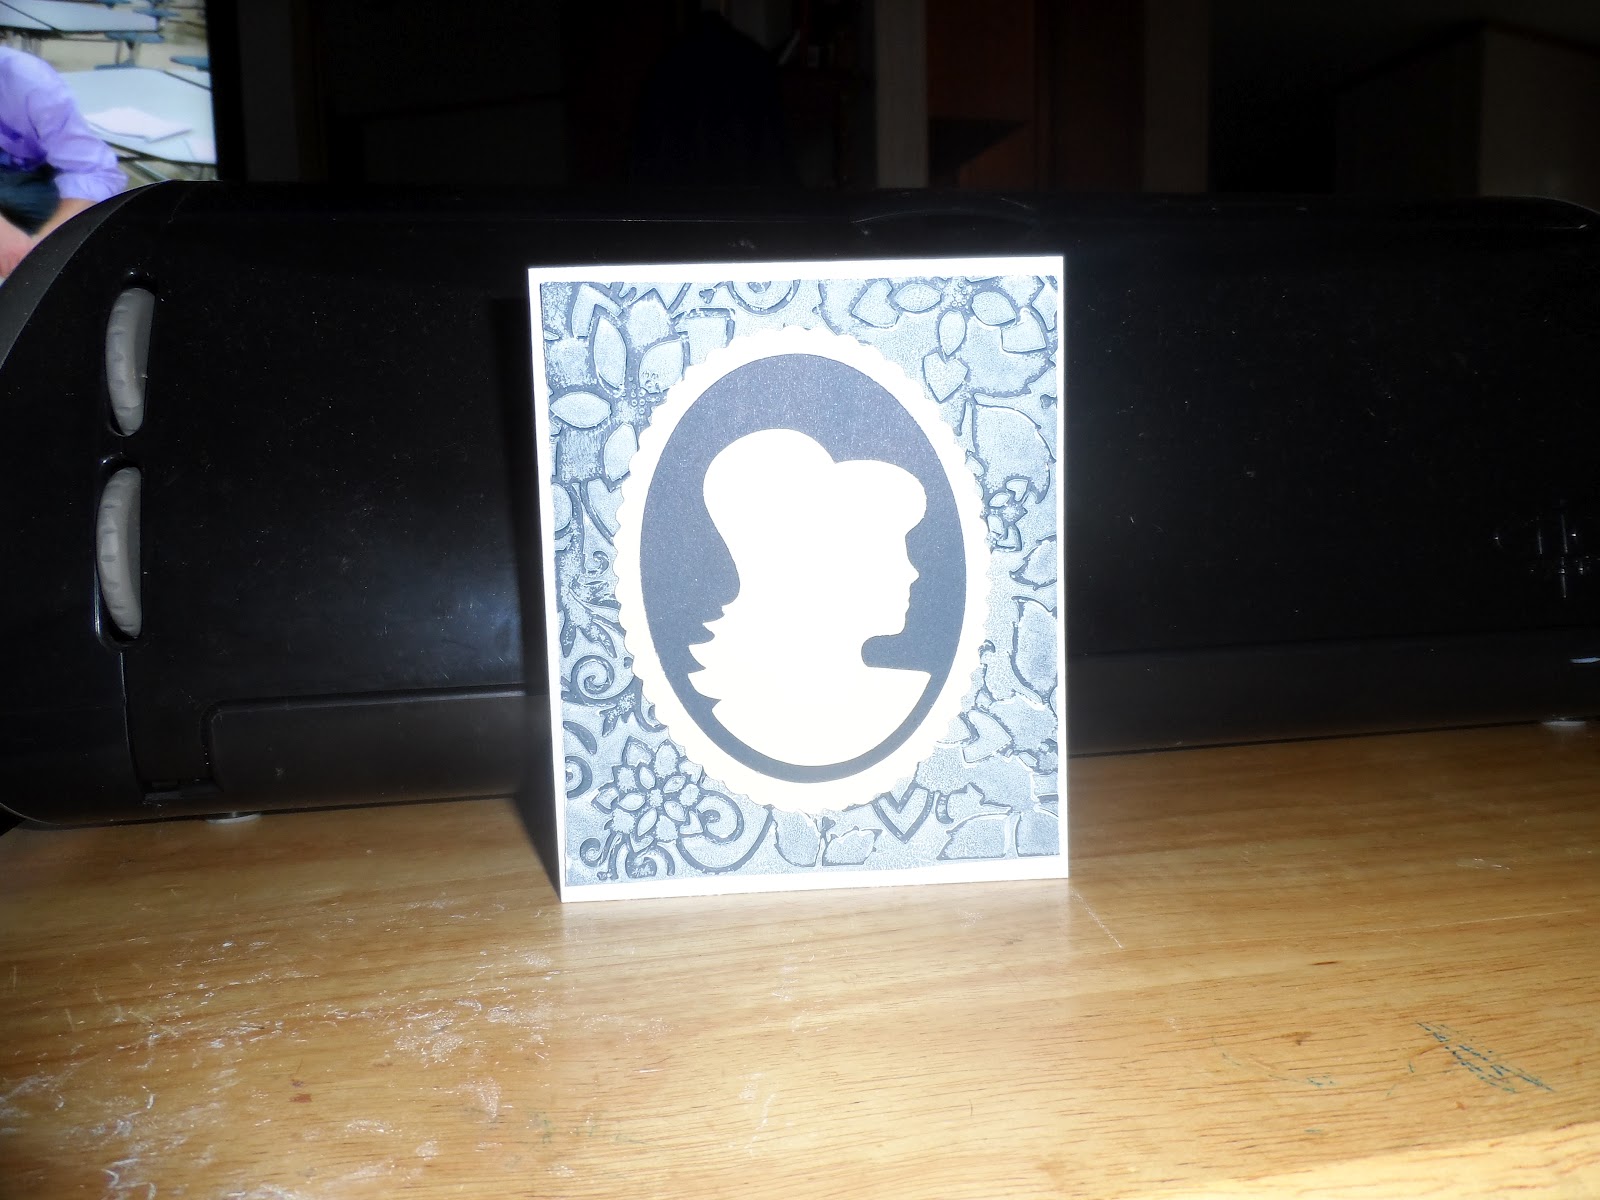
The first thing I did was ink one side of my embossing folder. I then took a 4 X 4 3/4 inch piece of dark colored card stock and embossed it with the inked folder

This is what the folder looks like when you remove the paper. The ink will rinse off your folder with warm soapy water. I do this a lot and have never had a folder stain.

This is my paper after it was embossed with the inked embossing folder.

I used the "Emblem" feature found on page 36 of the Forever Young cartridge handbook and cut it at 4 inches.

This is my completed card.
For my next card, I cut this tag out from the Jubilee cartridge found on page 81 of the handbook. I cut out 8 tags total. I cut out 4 in white, 1 each of 1, 2 , 3 and 4 inches. I cut out 4 in black, 1 each of 1.25, 2.25, 3.25, and 4.25 inches. I then cut the small layer and the loop off to make a rectangle.

I then took the white rectangles, and used a small amt of removable adhesive and layered he white cuts making sure they were as centered as possible. I then took black Momento ink and randomly stamped a flower on the layered paper. Make sure you use an ink that will not run. After I stamped on the flowers, I also randomly stamped small leaves.
I then colored the flowers and leaves with alcohol ink markers.
I then separated the layers, and adhered the white colored layers to the appropriate sized black layers, then completed layering all layers.
Here is my completed card.
The flower and lead stamps, and sentiment is from Close to My Heart.

For my next card I used the cartridges Tags, Bags, Boxes and More 2 and Every Day Pop Up Crds.
The bird is found in Every Day Pop Up Cards on page 29 of the handbook, cut at 2 inches. I used black gel pen to outline the birds wing.
The "Thank You" is found in Tags, Bags, Boxes and More 2 on page 24 of the handbook, cut at 1.75 inches. I used Cream Pearl Pen on the flowers and Transparent Rose Pearl Pen on the "Thank You". I also embellished with precut flowers, buttons and pearls.

T
Great cards!! Loved them
ReplyDeleteMCCR DT Shelley
Lisa - wow, I love the details you gave us on how you made the projects! I have not tried the embossing folder inking idea yet but keep meaning to do it! Thanks for the reminded - maybe I will finally try it!
ReplyDeleteI love the way you made the flower card with the rectangles! Really neat effect!
Teresa
MCCR DT sis
Very pretty cards, you did an awesome job!!
ReplyDeleteSusie
MCCR DT Sis
http://scrappyrandomness.blogspot.com/
love that technique!! awesome blog hop!!
ReplyDeleterobin
http://cutonedesignsbyrobin.blogspot.com/
Your cards are so cute!! I'm your newest follower. Hope you'll come and visit me.
ReplyDeleteTara
www.craftindesertdivas.blogspot.com
Beautiful! Love your card!
ReplyDeleteVery nice job on your cards! I really like the birdie one:)
ReplyDeletewonderful cards. I love the inked embossing!
ReplyDeleteSarah
craftingwithsarah.blogspot.com
MCCR DT SIS
Nice cards! love all the detail! thanks for sharing1
ReplyDeleteReally fabulous projects Lisa. I have nevered tried inking my emblossing folders, but I am going to try it soon!! Love the layered card.
ReplyDeleteSuch cool ideas. Techniques are always fun to learn and create with! The silhouette card is fantastic and the colors in the bird card are very inspirational. tfs in the hop!
ReplyDeleteJen
http://koalatcrafts.weebly.com/
Great projects.... love your cards :))
ReplyDeleterrandrr@insightbb.com
love that embossing idea!
ReplyDeleteWhat wonderful projects! Love the embossing with ink..gonna give it a try. Thank you for the inspiration!
ReplyDeleteVery elegant projects. Thanks for sharing.
ReplyDeleteafternoonscrapper.blogspot.com
Wow, I love your embossing technique. Will try this for sure.
ReplyDeleteI love your projects! I love the techniques you used!
ReplyDeleteI love your first card with the inking of the embossing folder! This is one of my favorite techniques! And your card turned out super cute! Love the other cards as well! Great Job!
ReplyDeleteNadja MCCR DT Sister
Great projects!! I would love to try the inking the embossing folder technique! thanks for sharing!
ReplyDeletecathyplus5.blogspot.com
MCCR DT
Beautiful cards. Thanks for sharing the embossing technique. Great job.
ReplyDeleteKris
dietzrobles at yahoo dot com
Love the cards Lisa! I especially love the inked folder and the Cameo . Truly a stunning card! TFS, Mary M
ReplyDeletehttp://Mary-fortheloveofart.blogspot.com
cute projects. Love the tip with inking the folders. I will have to try that. TFS
ReplyDeleteMCCR DT, Lisa Ch
Wonderful cards. I adore the inked embossing on your first card and that pattern fits so well with the silhouette image. Love the fun layers on your second card. Cute birdie on the last one. Great Job!
ReplyDelete:O)
Jessica S
MCCR DT Sister
WOW! What awesome cards!!! And I gotta try how you did the embossing!!! Super cool!!! Great job!
ReplyDeleteCrafty Hugs,
Jessica-MCCR DT Sister
www.craftinandstampin.blogspot.com
Beautiful projects.
ReplyDeleteRobin L.
great ideas with the embossing folder, might have to give that a try!
ReplyDeleteWow everything is so pretty!Love it!
ReplyDeleteGreat projects Lisa!
ReplyDeleteMiranda :)
MCCR DT Sister
www.nanasscrapspot.com
I loved your choices, great creations!!! :) dulcindaa.blogspot.com
ReplyDeleteAmazing projects!! Love the silhouette card!!
ReplyDelete~Jenn~
1scrappyjenn atgmail.com
scraphappensembellishit.blogspot.com
Thanks for sharing the embossing folder inking concept. I have not tried it, but it is on my list for my next project.
ReplyDeletemb6464@hotmail.com
marciasmemories.blogspot.com
Wonderful job! Cards are so cute!
ReplyDeleteChristina
Thanks for sharing your pretty cards
ReplyDeleteSweet cards! I love how you did the background on the first one. I also love how you so your projects, by starting from the beginning of the project and then showing us the final project. It reminds me of opening a gift! Love the anticipation!
ReplyDeleteohhhh....love that you inked your embossing folder, what an awesome technique, must try that next. You always have such great projects!
ReplyDeleteTFS!
Claire
My Cricut Craft Room DTM
I have always wanted to try to ink my embossing folder, but typically make layouts so I don't know how to incorporate it!! Your cards look great. I love the layered paper/stamped flowers card!!
ReplyDeleteI have wanted to try the card with the CTMH stamp on it. I love the idea of the different layering of the blocks. What a wonderful idea with inking the embossing folder. I love the effect that it makes.
ReplyDeleteMCCR DT Sister~Sharon
What great cards. I just love the first card. The layered card is pretty neat. Something I'm going to have to try.
ReplyDeleteTammy S.
My Cricut Craft Room Design Team.
Cute, cute, cute projects!
ReplyDeleteMelissa, MCCR DT
Very Cute Projects.
ReplyDeleteRobin Lane